It’s one thing to say you can recover data from a failed hard drive, it’s another thing to actually demonstrate the process. One thing we like to do here at ACS Data Recovery, is highlight some of our cases in video form. In this case, we are recovering data on a 3TB Seagate hard drive that was dropped. You will find the video below, which you can click on and watch. You will also find the full video transcript below that as well.
Click Above To Play Video
VIDEO TRANSCRIPT
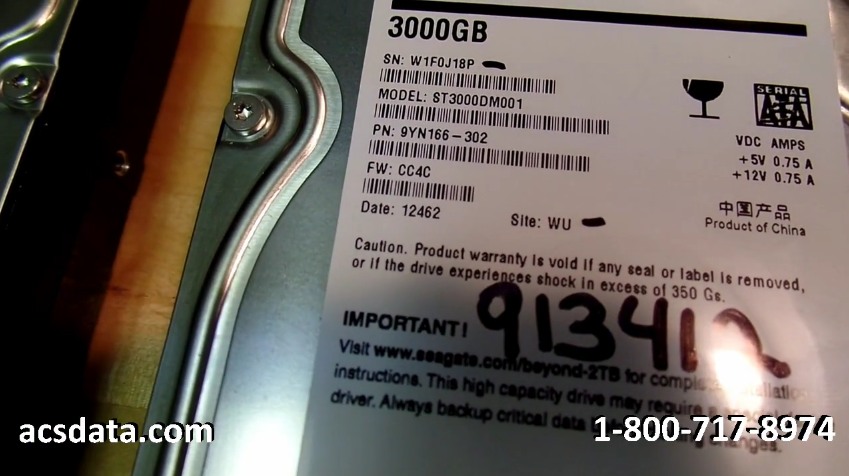
Okay, this is going to be data recovery case 913412 (you can get your own recovery case started by clicking this link). This is going to be another case that we kind of document from start to finish, and see if we can get this recovered for a customer. This is an actual customer job. This is not a demonstration. This is not kind of a how-to video or anything like that.
This is an actual job that we’re working on. This is a 3 terabyte Seagate hard drive. It was actually inside of an enclosure. A gentleman by the name of Scott sent it into us, said it was dropped from an approximately 2-feet in height down to a carpeted floor and after he went to go power it up again, the drive was making all kinds of unusual noises and so he just turned it off and sent it in to us.
One thing I would not recommend doing if a drive has been dropped and it has data that you absolutely have to have, I would not recommend powering the drive up at all. There’s a number of things that can happen. You can actually have the heads come apart and land on the platter surface and seize there.
If you go to power it up it may actually, the rotation of the platter, or the attempted rotation of the platter may actually free itself from the heads when they’re seized like that. It can sheer off the end of the head assembly and then scratch the platter surface.
Sometimes you can have an issue where the spindle bearing hub, the bearing for the spindle hub becomes damaged and warped, and it’ll actually prevent the platters from rotating. That’s a very common problem in Seagate hard drives. I’ll almost be surprised if that’s not the case here. Also, too, you can have just an issue where the heads slam into the platters and just damages them. They actually become mangled on the ends for lack of a better term. We’ll take a look at it and see.
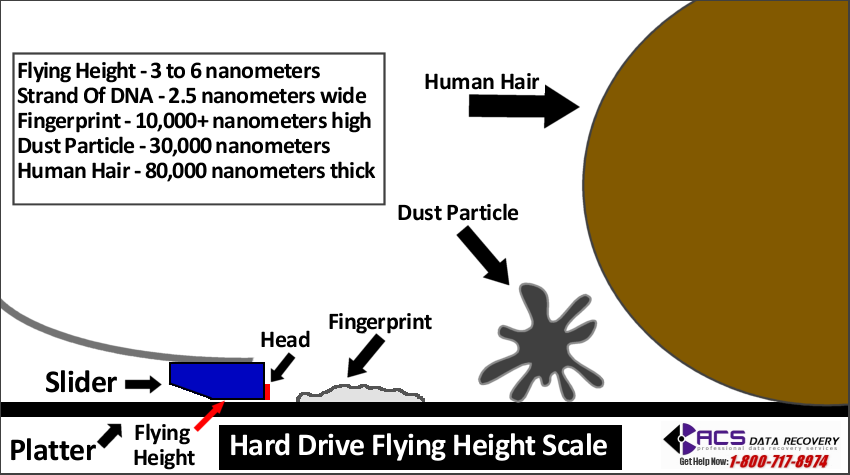
Hard Drive Flying Height
With these 3 terabyte drives, you end up running into a little bit more problem with them just because of issues with the flying height that they use, it becomes closer and closer. As they pack more and more data onto the platter surfaces, they actually have to have the head float even closer to the platter.
They do that so they can narrow its focus and it can read a smaller track, and they can make the tracks more and more narrow on these platters so they can still get, still use the same sized platters, but they can pack more data onto them because the heads are reading so close. To put it into perspective, these heads on this particular 3 terabyte drive probably read—they probably have a flying height of about 4 to 5 nanometers. A strand of DNA is only about 2.5 nanometers wide. That tells you how close the tolerances are. So, any imperfections in the platter surface, any imperfections in the head assembly, if it were to become damaged in any way, can absolutely impact the platter and start to score it, and scratch it.
Hard Drive Compatibility
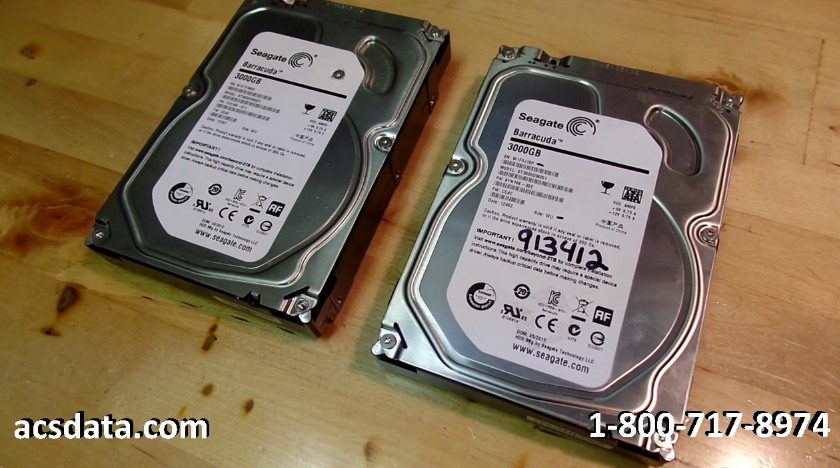
We have our parts drive here that we’ll probably use. It’s one that we’ve used before. We generally reuse parts drives from one recovery to the next, but they match up with what we need on this drive. Generally, we try to match up the site code on Seagate drives and you’d see it there. It says WU. That tells us it was made in China.
We also try to match up the first three in the alphanumeric of the serial number, which on this one here is W1F. We’re on our parts drive, W1F for the serial number and the site code is WU. On paper, these match up pretty good. It’s not really cut and dry. We’ve actually used, quite often, heads from a completely different model drive, different site codes, things like that, but these are just the things that we try to match up.
You start to build a database of things that you know will kind of work over time when you do a lot of these and sometimes, if you don’t have the parts you need or you can’t locate the exact part you need, then sometimes you just have to go with what you think should work theoretically and sometimes it does and sometimes it doesn’t. We’ll go ahead and take a look at this in a clean room first, kind of determine what condition it’s in. Like I said, I think the spindle bearing may be damaged if it was dropped since it’s so common in Seagate drives, but I could be wrong. I’ve been wrong before on these. We’ll go through and take a look at it and go from there.
Okay, I’m going to go ahead and do a voice over recording for these next couple of parts of the video instead of trying to talk over the constant noise of the flow hood and I think it comes out a lot cleaner this way.
Data Recovery Process Step 1 – Initial Evaluation
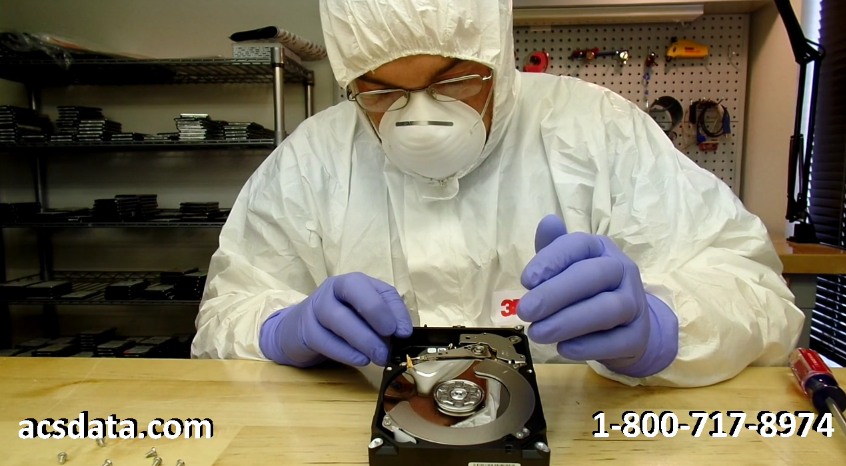
What we’re doing right here is actually just the initial evaluation on the drive. We’re going to go through and just take a look at it, and see what the extent of the damage is. We know that the drive was dropped and we know it suffered an impact.
On Seagate drives that can create a number of problems, so we don’t want to power this drive up without taking a look at it first. Generally, you can have an issue where the spindle motor’s damaged, the spindle bearing itself so that the platters don’t rotate.
You can also have an issue where the heads come apart and seize themselves to the platter surface, which makes kind of a buzzing sound when that occurs. Same thing when the spindle bearing’s damaged. You can also have a problem where the heads come apart and slam into the edge of the platter when it impacts. Any of those issues is definitely not something you’d want to power up the drive and risk doing any damage to the platter surface at all.
During this initial evaluation we’re just kind of determining what it is we need to do during the recovery, how extensive the damage is, and then be able to relay that information to our customer so that they can be informed of everything that is going on step by step. It will also help us formulate what the exact price is going to be for the recovery because it varies greatly in difficulty from one type of issue to the next.
Findings – Severely Damaged Read-Write Heads
Right here, whenever it’s open, I can see easily that the heads are damaged. It was obvious that whenever the drive dropped it actually impacted and slammed the heads into the edge of the platter surface and twisted them up pretty good.
One in particular, is extremely damaged so I’m hoping, at this point, that the customer did not power the drive up for very long with that head twisted up. I’m taking a picture here to show the customer because I will update that ticket to their ticket so they can see exactly what it is that we see when we’re working on it, and what the problem is that we’re facing.
This is actually what I took. You can actually see the heads are numbered zero through five, and zero is on the bottom. So that’s 0, 1, 2. That’s head two that has the most damage to it.
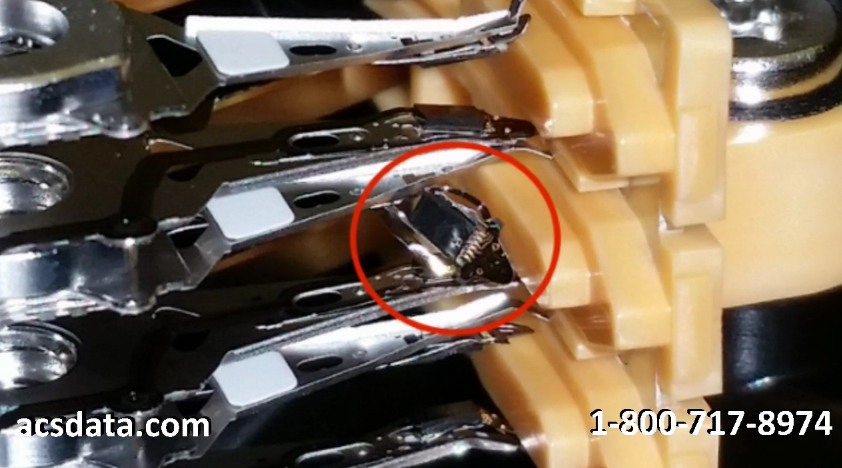
You can actually see that it is twisted up pretty good. Right now, I’m just looking at the rotation of the platters on the hub making sure that it doesn’t appear to be warped in any way, shape, or form. If it’s warped at all, that will throw the track alignment off and you’ll never be able to get anything of any substance off the drive because the tracks will be out of alignment.
Once we’ve taken a look at this, put everything back together, then at that point we can go through and kind of formulate a plan of what we need to do. In this case, it’s pretty obvious that the heads are bad. Judging by that kind of damage and knowing that the drive was powered up, we’ll probably—we already know in most cases, we’re going to have to go through multiple sets of heads on this and it may not be recoverable at all because it just depends on how much damage that one head or even the other heads that are out of alignment, as well, may have caused.
The top platter surface and some of the other surfaces that were visible there looked fine, but you can actually have damage to a platter surface that’s almost at a microscopic level. Sometimes we can scope those and point that out, but it’s hard to do that on the inner platters to be able to do that with any efficiency.
A lot of times, you just have to go through, move forward and make the recovery attempt. Once this is buttoned up, we’ll go through and notify the customer and then wait for their response as to whether or not they want us to proceed with the recovery on this.
Customer Authorizes Data Recovery
Okay, so our customer decided they wanted to proceed with the recovery attempt. We updated their ticket after the evaluation was done. We confirmed the cost with them. They deemed that the data was worth the effort to go through and try to get it off.
We don’t charge anything if the data is not recoverable in most cases as long as the drive itself has not already been opened and worked on by anyone. Some people wonder why we still charge an attempt fee in a case like that where it’s already been worked on and the simple reason is, more often than not, the inside of the drive is heavily contaminated with dust and debris. Plus, beyond that, we don’t know what all has been done to it. We can be chasing our tails, working in circles, trying to perform a recovery and utilizing remedies that should work and then scratching our heads as to why they aren’t working because somebody’s gone off and switched out the controller board without telling us or they’ve done something that’s caused further damage to the drive internally.
We’ve had drives that have come in that have been just a complete mess inside with fingerprints and everything else all over them. Like I said, the only time we ever charge an attempt fee on a recovery is in a case where it’s already been opened by someone. Even computer repair technicians and stuff like that, we just, that’s not their specialty just like we don’t work on building computers or replacing motherboards, or anything like that.
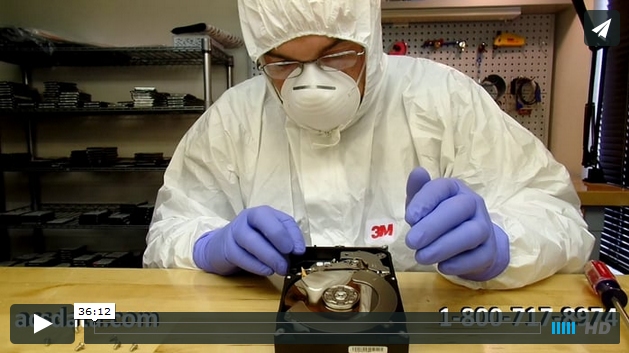
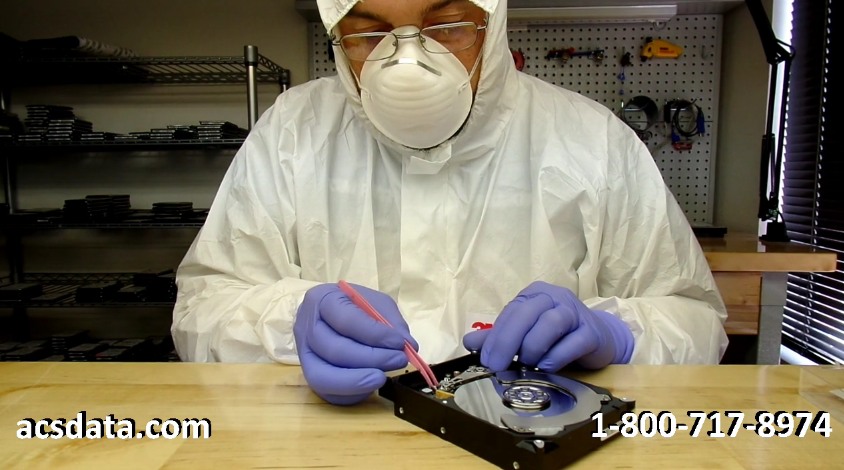
All we do is work on hard drives. These are extremely intricate and complex devices. This is probably one of the more complex components within the computer itself when you really drill down how they actually function. When we go through and work on the drives like this, we try to do it in as clean of an environment as humanly possible.
Data Recovery Process Step 2 – Hard Drive Repair
The flow hood that we work under creates a class 100 clean room environment. It pushes out highly filtered pressurized air that keeps all of the other dirty air outside of that region from contaminating the internal components of the drive. Then, we just kind of make sure we keep ourselves covered up as much as possible so we’re not dropping skin flakes and dust, and hair, and things like that down onto the drive itself because you can actually have debris on even a microscopic level that you can’t even see with the naked eye, but it can wreak havoc on replacement heads. The goal here is to just provide a work environment that allows us to have the best possible chance for success when it comes to actually recovering the data.
Right now, I’m just going through and removing the upper magnet. The magnets are extraordinarily strong on these drives. It’s a key component to the actual function of them. If you really want to read into how awesome these things are, just go onto our website there at acsdata.com and we have a write up there and another video that somebody produced that just shows how hard drives work. You’ll really get a feel for how complex they are and how intricate they are.
Remove and Inspect the Damaged Heads
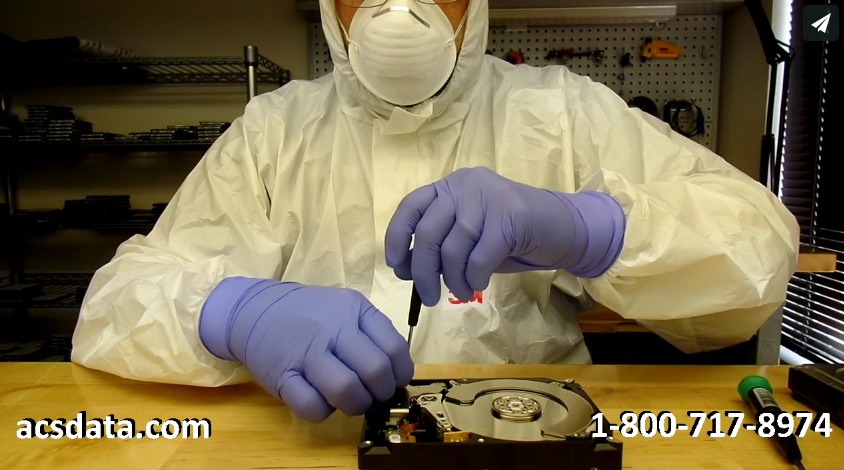
The bolt I’m removing now, the screw I’m removing now is essentially the one that anchors the head stack to the chassis. If you’ve watched our Western Digital Data Recovery cases, you’ll know that those heads don’t have, most of them anyway, a bolt that anchors the heads to the chassis itself, they just kind of slip down onto a shaft there and are loosely mounted inside the drive itself.
I’m just looking, at this point, to make sure that all the sliders are in place, that there aren’t any components of the head assembly that are missing because if they’re missing, we need to make sure that we find them and that they’re accounted for because if we don’t, we may put in another set of heads and they, it just kills them right off the bat.
We try and go through and make sure that there’s no dust or contamination at all in the drive and to see also, if any debris blows out of there that we might have missed that may have come off the head assembly. We always make sure to just double check the platter rotation just to make sure that there’s no, any type of warped appearance to the rotation itself.
Parts Drive Disassembly
At this point, we’re just going to go through and disassemble the parts drive. This will have the heads in it that we’re going to use to replace the damaged heads. It’s essentially the same process, we just remove the PCB and all the same components that we just removed on the customer’s drive.
Now you can’t just swap PCBs out. We have another video out, as well, explaining why that’s not possible. Sometimes a drive will fail and a customer will just take that green board there, the controller board, and move it over to another drive. It just doesn’t’ work, even, if the drive has a bad PCB. A lot of times, on newer drives and I mean within the last, manufactured within the last 8 to 10 years or so, there’s a unique adaptive data that’s stored on that controller board that has to match up with what’s on, that’s also stored on the platter.
There’s data stored on the platter and data stored on the controller board, and it has to match up. Even if you have a controller board that came off of a hard drive that was right after yours on the assembly line, they’re still not going to match up. The adaptives that are in there are going to be unique.
Install The Replacement Heads Into The Hard Drive
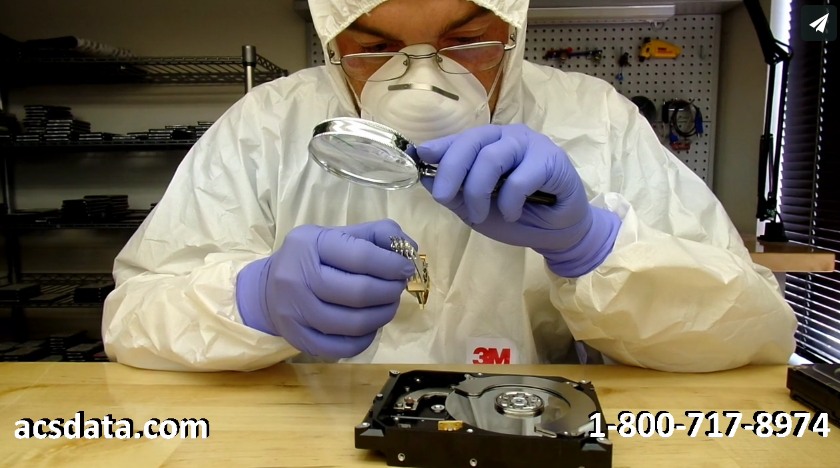
Here, I’m just making a double check on these replacement heads, make sure that they look good. We generally use these multiple times. That’s one of the reason we don’t charge for parts, we can just reuse them from one recovery to the next. Once we’re done with them we just move them back to their source.
Okay, just skipping ahead a bit, we are preparing to mount the new heads into the customer drive. Now we have the heads just getting parked back onto the ramp. Excuse my hand, but there’s really no other way to do this and this isn’t really a how-to video, this is just kind of demonstrating the entire process that we go through.
Getting the heads reparked and making sure that you do it without damaging the replacement heads is really a key element to this. Once you have that part done then you can go through and actually finish the remaining assembly of the drive. We’ll start by just replacing the magnet and once that’s in place and locked down, we’ll go through and start replacing the screws that we took out and do one check to make sure that the heads seem to line up and ride out to the platter without any issues at all. We don’t want them to hit the platter surface at all whenever they’re coming off the ramp.
Final Assembly
Now, it’s just a matter of reassembling everything; the few screws that we took out and then we’ll go through and put the case back on, and we’ll prepare to take it in and see if we can get it to image. Once that is done, that’ll kind of determine what the next course of action will be. Sometimes when you image a drive it doesn’t last very long, but we’ll just have to see what this set of heads does.
All right, so we just got done doing the first head swap on this drive. I say first because I have a feeling, based on the condition of the heads, that it’s going to be probably requiring more than one head swap on this. The heads, as you may have seen in the picture that I also took when I first looked at them, were pretty tore up inside there. I’m afraid that if that drive was allowed to calibrate or attempt to calibrate a few times, it may have scratched that platter surface that those heads were aligned with. Anyway, we’re just going to see where we are with this. I’m going to go ahead and power this drive up.
Data Recovery Process Step 3 – Imaging / Cloning The Repaired Drive
You can see the busy light up there. We’re waiting to see if it calibrates. It’s trying to, I can hear it. No, that’s not going to be good. You can hear it, but I’m going to shut that off. Okay, so that’s kind of what I was expecting with this. No guarantees that this recovery is going to be successful even from the beginning knowing that the drive was dropped.
That generally requires us to go through multiple head swaps. It’s not uncommon for us to go through and do sometimes three or four head swaps on a drive to get a full image of it. We’re going to go through here, I’ve got another couple of parts drives in stock right now that match up with this one, so we are going to probably take this back in tomorrow and see what we can do, and see if another set of heads will work any better in this.
That’s disappointing, for sure, but that’s the way it goes sometimes. There’s nothing in here that guarantees that anything can be recovered on any of these, especially if the platters are damaged, which this one may very well be. We’re just going to go through and give it our best shot and try again tomorrow with another set of heads and see how we do.
Okay, so we have the drive for case 913412 attached to our imager again. We’re going to go through and make another try with this. Actually, this set of heads is already doing better than the first set that we had installed. The drive actually has become ready and we have it in our system, connected.
I’m going to go through and see if we can generate a bitmap with it. I worked with it a little bit just a minute ago and could not generate a head map on here, so it’s a little bit of a concern. I’m going to see if we can get anything imaged at all. I’m just really not holding out a lot of hope on this case, but we’ve been able to pull some of these off even when they look to be less than encouraging.
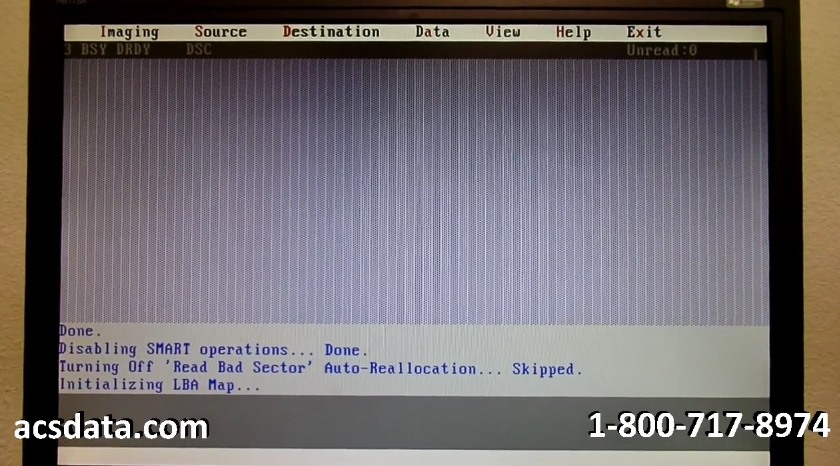
It’s going to take a little bit of time to initialize the LBA map on here. That’s what it’s doing right now. It’s kind of just reading how the data is laid out or how the sectors are laid out on the drive. This is such a large drive it may take a little bit longer to do. Also, this drive may not be in the best operating condition either. It got through the first step of it. You can see down here we’ve moved on to its initializing the selection map.
Here in a moment, it should start trying to image and locate any partitions that are on the drive. Once it does that, then we can actually just select to image those sectors. I would pause the video, but I think if this goes through and starts working, it won’t take too long to start. Then again, it may get to the point where it just doesn’t do anything. I’ll give it another 15 or 20 seconds here and see what we get.
Oh, okay, all right, well, it found a partition and actually, yeah, that’s a 3 terabyte partition so I can look over here, it’s got over 5 billion sectors in it. That’s the partition we definitely want. It was an external drive, so there’s just one partition on it.
We’re going to go through and select all the files at first. It’s actually imaging the bitmap fairly well. I mean it’s going along at a pretty good speed. I’m actually very, very happy with the performance right now of this drive. This is very encouraging. I’m going to go ahead and pause this and then come back once we have this bitmap fully generated so we can kind of see how much data’s on here. It’s going to take it a little while to finish this part of it up.
Problems Encountered
Okay, as you may be able to see here, you may not be able to read it, but it says, “Loading bitmap failed.” I started to run into a lot of issues with it trying to generate the bitmap on it. I’m just not going to mess with it. I’m just going to start imaging this drive.
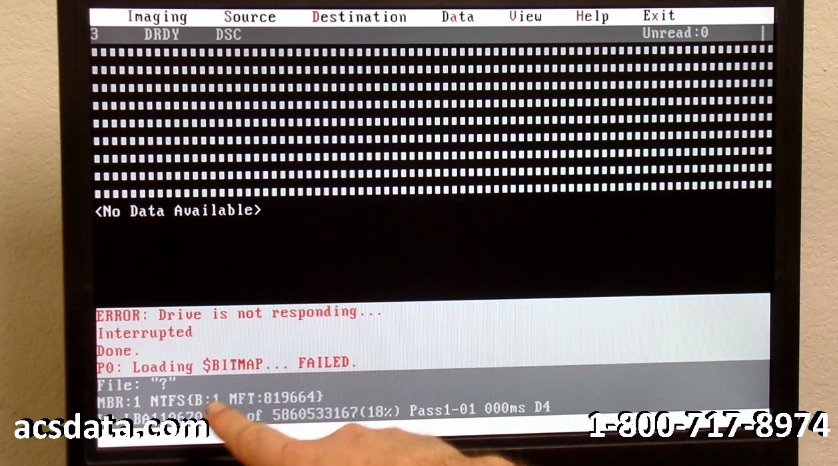
Sometimes when you have really unstable drives like this, you just need to get as much out of them as humanly possible. We know from the beginning, that this drive has data on it. We know that for a fact. So, for me to go through, it may be hitting areas of the drive that are damaged.
It may hit areas of the drive where the heads had actually impacted when they initially, when it initially impacted the floor and crashed. You can see right here it just hit a bad spot. It should skip these sectors, but I think there’s some underlying issues there within that drive, as well.
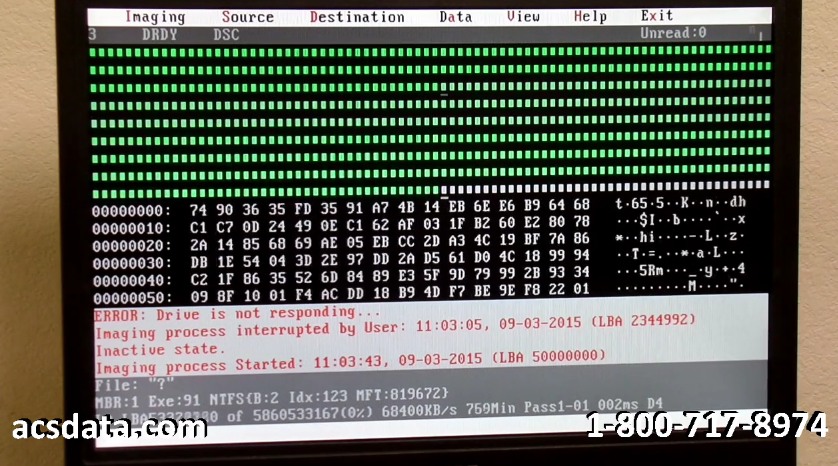
We may end up having to go through and put another set of heads in this as well before we finalize this. What I’m essentially going to do right now is—the drive’s rebooting itself automatically. I can watch up here and see. It may hang up in a busy state, I’m not for sure. Sometimes if they get to the point where it times out too much, it’ll actually just reset itself and we can change that setting here in a bit. This drive is extremely sketchy as far as how it’s functioning right now. I’m not sure if I want to go through and allow this to keep running like this.
What I think I’m going to do though is I’m going to keep this drive with this set of heads in it for right now and I’m going to try to work around manually, to image as much as I can, the easy areas that it can read. This should be a mostly automated process with this hardware imager that we use, but sometimes, you kind of have to just work around the areas that are bad.
We’re at roughly 2.3 million sectors of the drive. I’m going to go ahead and skip to about 50 million and just try to get it to image from there. I just wanted to try to avoid as many bad areas as it can and just do a really loose image at first, just grabbing whatever data we can off of this drive and then coming back and picking up the areas that we missed, changing the configuration a bit on how the drive reads and just kind of go from there. We’re going to let this run for a while. It looks like it’s doing a little bit better in this section and then go from there.
Again, this is a good illustration, like some of our other videos have been, that show how there’s really no—it’s no one-stop solution with these. Here we go again, it’s stopped. A lot of times you can run into issues where even if the drive gets to the point where the head swap looks okay and you get the drive to where it will actually calibrate, you still can’t get a good image of it unless you have the hardware that’s needed to be able to do it because they work in such a degraded state once they’re up and running.
If I had a head map built on this, which I’m still not entirely sure right now, I’ll look into this some more whenever I cut away from this video, there’s got to be some reason, some underlying reason within the firmware or something, that’s not allowing this to build a head map properly. If I had a head map I’d probably be able to tell which head is giving the problem and I can just deactivate that and can go and read the remaining good heads that are on this.
There are areas of the drive here that are reading absolutely flawlessly. We’ve only got about another 4 million sectors in, you can see right now, we’re at 54 million, before it just kind of paused. What I’m going to do is go through and skip to 60, just get past—I’m trying to see if there’s just little windows, little pockets of space that are having problems reading or if it’s something with a specific platter or head that’s having a problem reading.
I’m going to let this run for a little while and then come back to it. I may end up putting another set of heads in it if we need to. I really don’t want to. This is kind of one of those things where if it’s not entirely broke, we don’t want to try to fix it and if we can get the bulk of the data read off of this drive now, that’d be absolutely amazing. We’re going to let this run and it looks like it’s doing a little bit better right now. Then we’ll see where we are here within a few hours.
Success! Full Recovery Completed
Okay, we have case 913412 finally showing some good results here. Another set of heads in this. We’ve kind of gone through a spell here, we weren’t having a whole lot of hope that this drive was going to be recoverable. We’ve gone through, at this point, and put in just this morning, a fourth set of heads in this drive. This set of heads is actually responding extremely well.
You can actually see, at this point here, how fast the drive’s actually imaging. There could have been a couple of different things. There could have been some issues where there was just slight incompatibility with the heads that we had even though they were a good match on paper.
Ironically, this set of heads that we installed was from a different site code. They were actually manufactured in a different country. Usually, when we do recoveries, we have to be really conscious about matching up site codes, country codes, and getting close to the same date of manufacture if we can within a couple of few months or so.
This drive here was actually a little bit newer, but it was a different site code and the results speak for themselves. The drive is just flying through right now. I didn’t even want to waste time trying to generate a bitmap mainly because the fact that I know that this was an expansion drive, which means we don’t have an operating system on there, we don’t have program files on there.
The customer said they need everything off this drive, so there’s really no since wasting time generating a bitmap because we don’t know how long the life is going to be on this set of heads that we have in there. We want to try to get as much as we can. We can see now, we’re about 27 million sectors into the drive already.
We’ve got 182 images showing up, so it’s just at the very, very beginning stages of it. Customer says there’s probably only about 100 gigs of data on this drive, so we’re going to go through and let this run. At this point, I almost want to say that this is going to be a successful recovery, but I don’t want to jinx myself yet. We’re going to let this run for a little while longer and see what the data looks like, and we will follow up shortly.
Okay, we finally have case 913412 completed. We’ve gone through now and freed up all the data and have everything rebuilt, and ready to copy over to the new external drive. There actually ended up being, on the clone of this drive that we have connected, there actually ended up being 1.4 terabytes of data used on this drive, so a little more than the 100 gigs or whatever it was I think they said that they had used initially.
This drive took a little while to get imaged, but once it imaged the rest of the way, it was beautiful and everything worked great. I’m not going to show any of the data on here, but basically this was just a backup of our customer Scott.
We went through and completed everything for him. Now, we’ll go through and copy everything over to a brand new external drive. There was about, I want to say, 50 or 60,000 images on here for a customer, so it was definitely something he definitely needed and wanted for sure.
It took us a total of about, let’s see, we started this case on the 2nd of September and it is now the 15th, so almost two weeks to complete this. Mainly, that was just due to the fact that we had so many issues with those heads being compatible and everything else and just getting the drive imaged.
A long case, not completely out of the norm for what we do. We run into a lot of odd cases and that’s the difference between being able to do recovery work and knowing how to tackle certain problems as they arise. This one was definitely successful and we’re going to get ready to finalize it, and get it shipped back to our customer.
If you have any questions about our services, visit our website at acsdata.com. You can also give us a call at 1-800-717-8974 and we’ll be happy to help you. Thanks for following along on this exhausting recovery we’ve been working on, and glad we could do it for you. Thanks.


